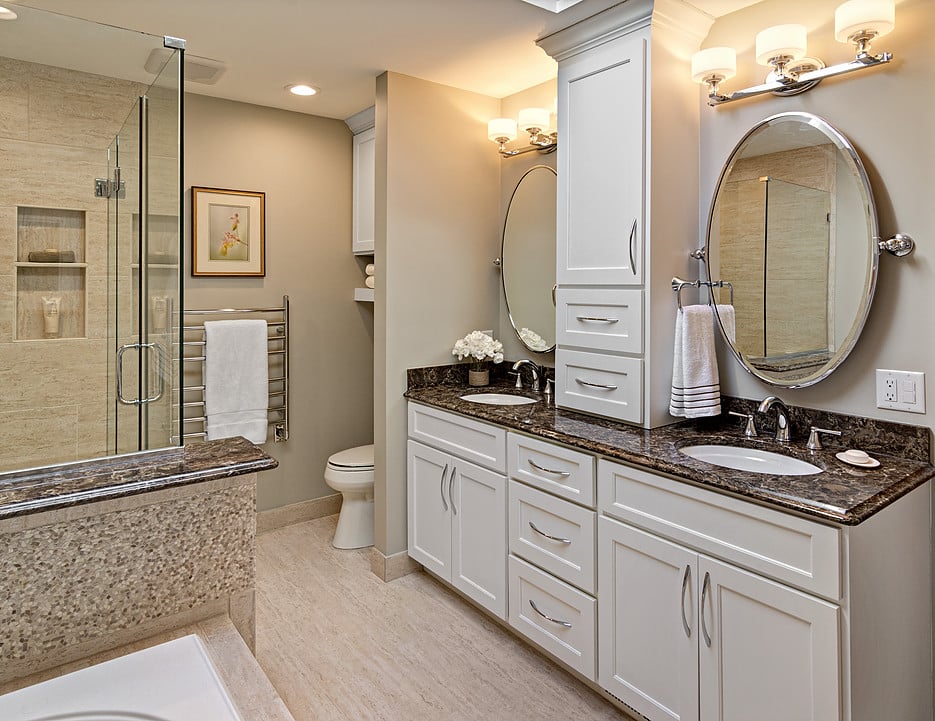
Remember our previous post on updating your 90s era kitchen? Well, today, we’re tackling another major room in our quest to update the 90s home: How to Update the 90s-bathroom remodel before and after, 90s bathroom makeover. After all, 90s style didn’t typically contain itself to one corner of the house. It left its mark everywhere.
RELATED: What New Flooring Goes with Oak Cabinets?
The good news is that bathrooms are usually the smallest spaces in a home and sometimes you can do an easy bathroom mini makeover on a tight budget updating hardware or swapping out your 90s lighting with a DIY project. But they can also be the most expensive to remodel, especially a master bathroom complete overhaul. Plumbing, electrical work, carpentry, and more all play a role. So it’s a room you absolutely want to plan out before jumping into demo mode. It can be tempting to rip out those decades-old countertops and shower doors. However, the best way is to have a design in place first, so you know exactly what you’ll be doing. Prioritize your budget by hiring an interior designer to work through the planning and design up front. It’s also a great way to avoid change orders and surprise costs to your project.

So, without further ado, let’s talk updating the 1990s bathroom. Because chances are, if you don’t have some of these elements in your bathroom, your neighbor most certainly does.
RELATED: Stunning 90s Home Kitchen Updates (Before and After)
What jumped out right away to us on this project was the color palette. Per typical 1990s-era style, cabinetry and trim throughout this space was all oak. This had the effect of making the room feel cramped and closed in on itself. Paired with those outdated brown tones was a shade of blue. This similarly made the space feel a bit jarring. In theory, blues can be relaxing and do frequently work well in bathrooms. But a shade this saturated didn’t quite work for the room with the finishes that were in place. Instead, it immediately evoked 90s memories. Beyond the color scheme, the room felt like it was too divided. The result was that it made it all feel smaller than it really was.
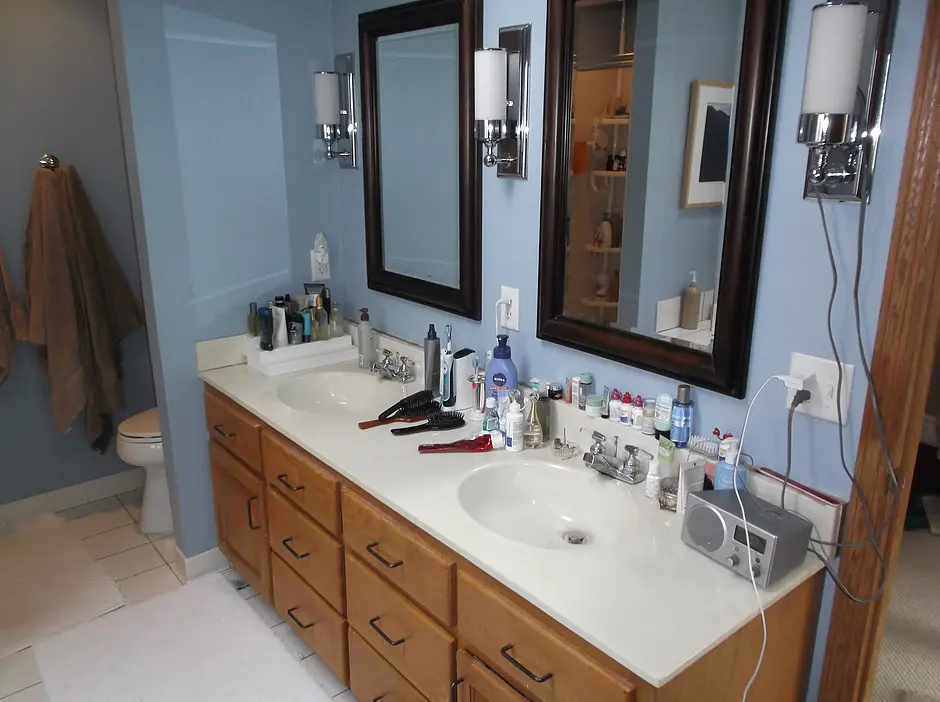
Double vanity sinks in this bathroom had a decent amount of counter space, but it all felt cluttered and cramped without proper storage options built in.

Powder blue walls paired with an outdated gray tub, basic white tile, and oak trim made for a non-cohesive and confusing color palette.
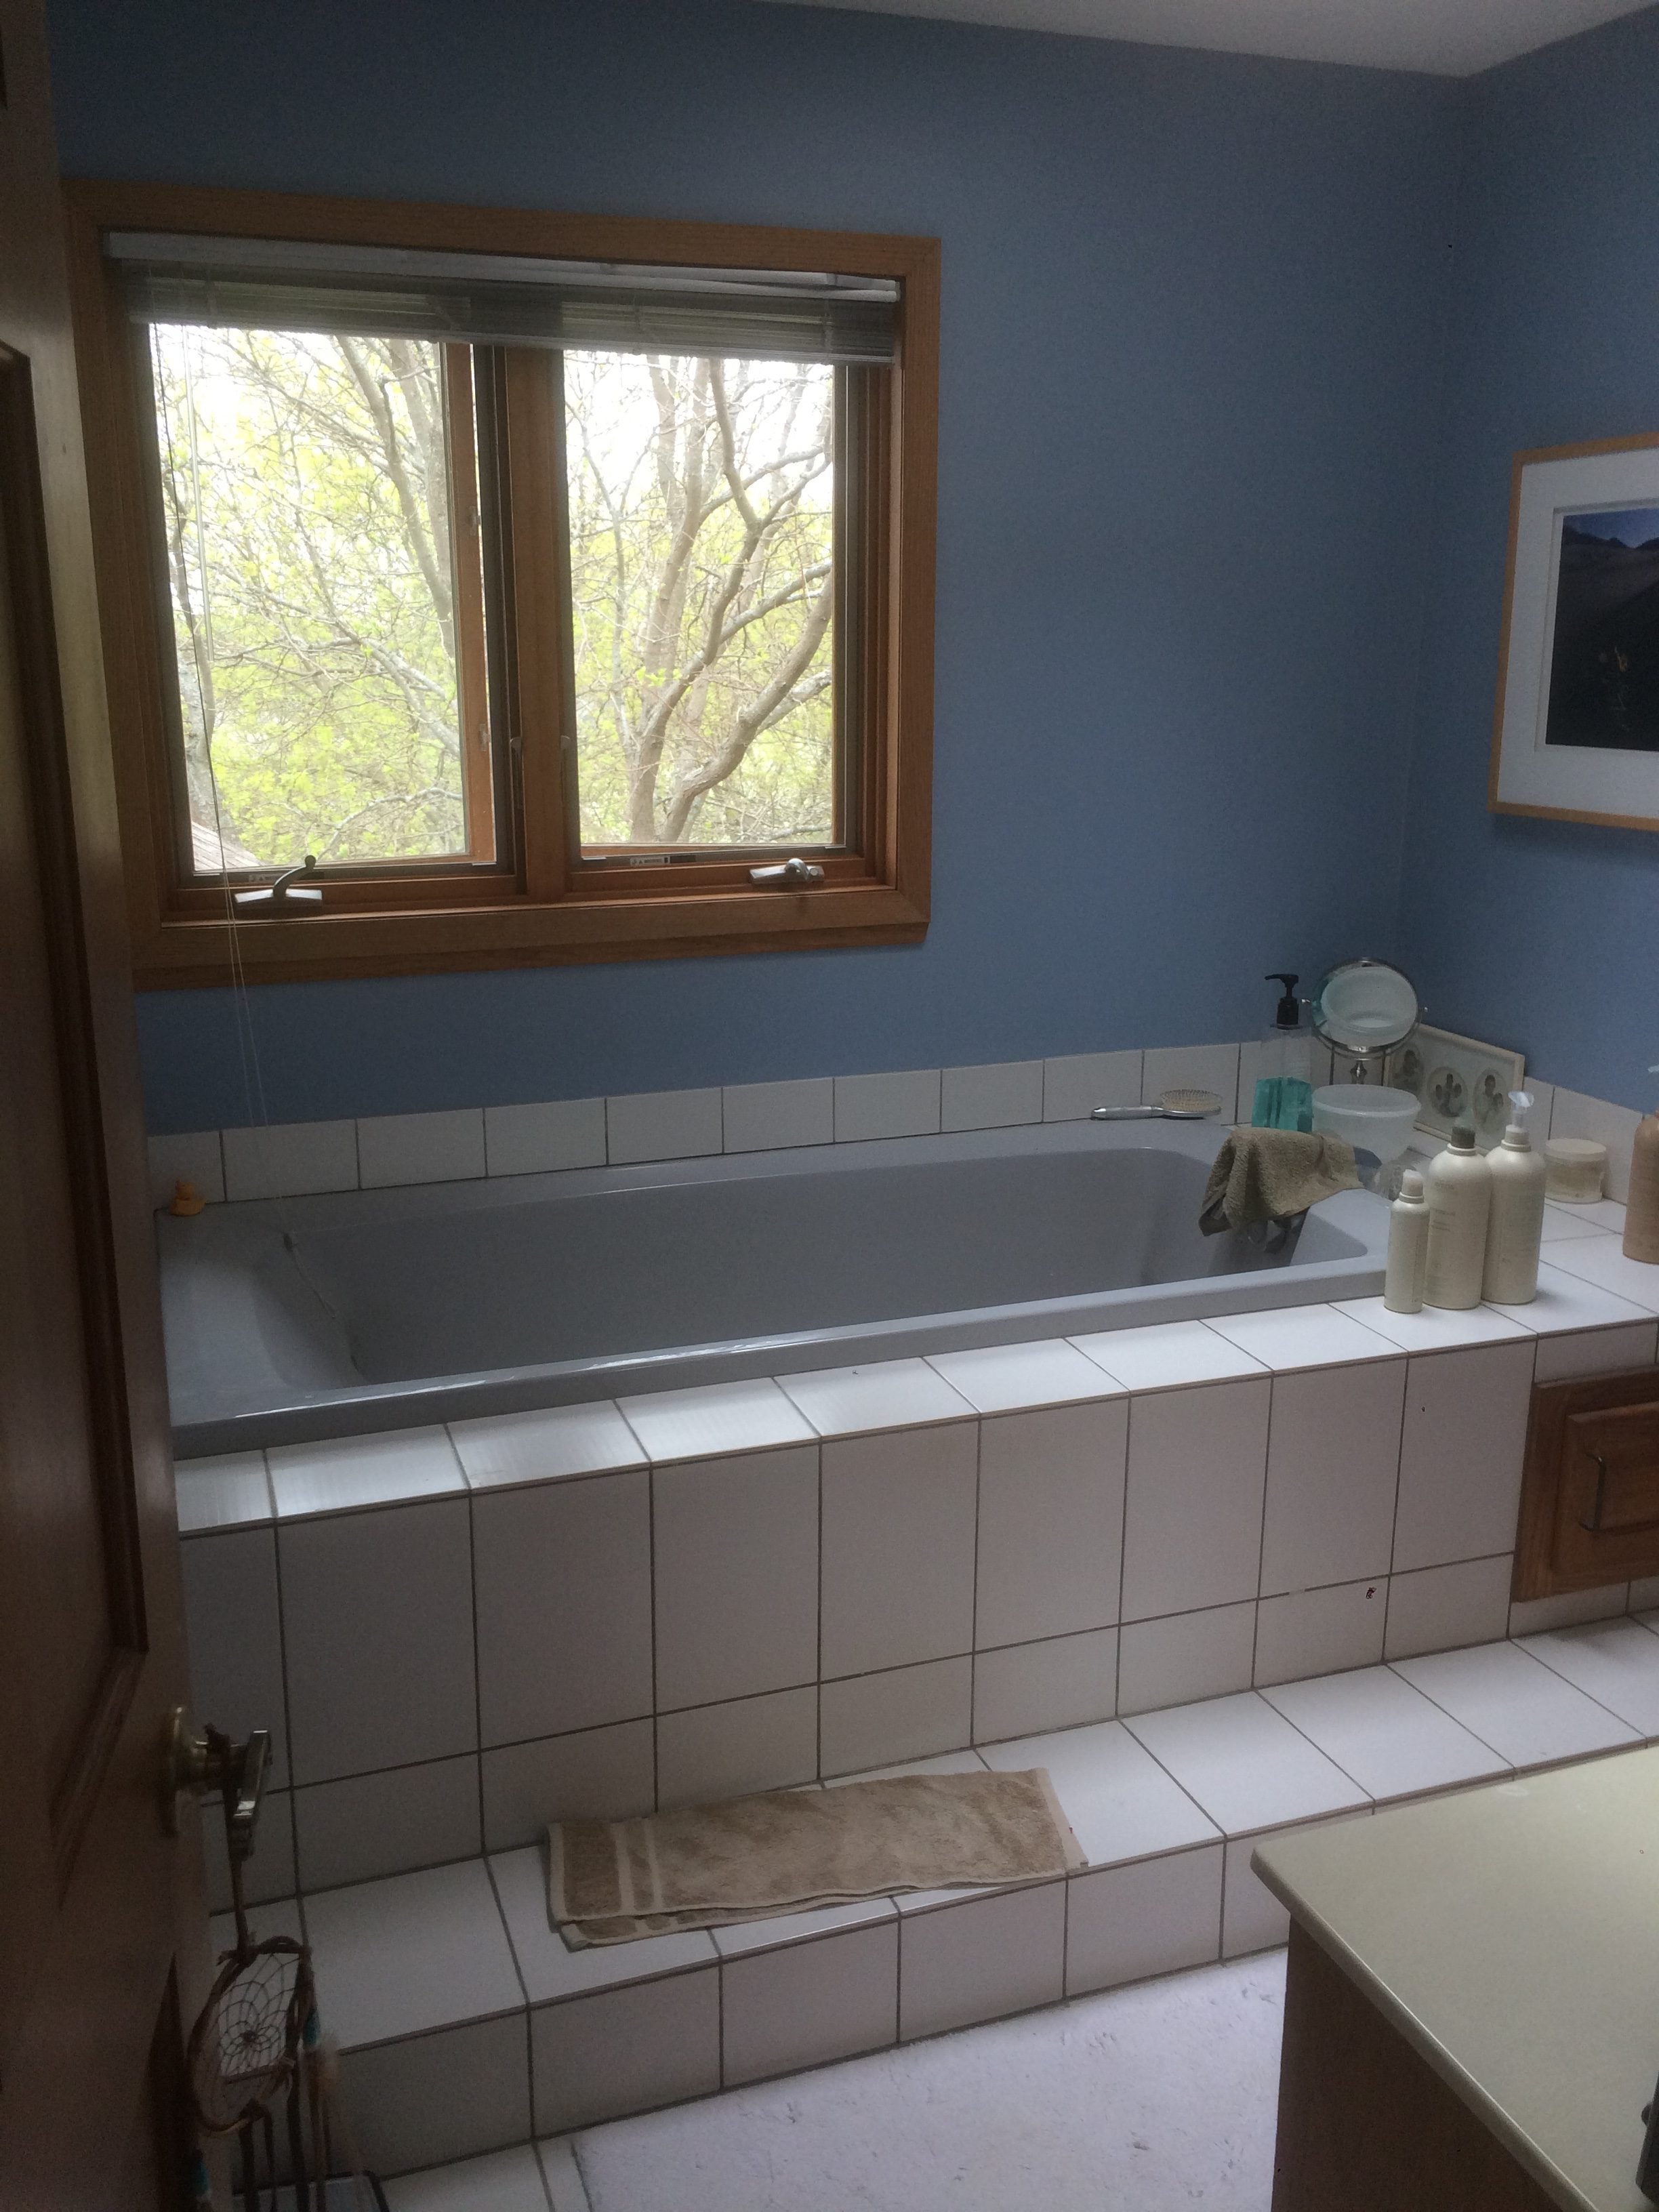 Oak trim around the windows made the natural light feel muted and darkened the space overall.
 The shower was a dark small space and closed off from the rest of the space by a solid wall.
RELATED: What New Flooring Goes with 1990s Oak Cabinets?
First thing to begin our transformation of this 90s bathroom makeover, we started with 2-D and 3-D renderings showing in detail the room’s potential. The original bathroom had both a tub and walk-in shower, double vanity sinks, and a separate toilet nook. The existing floor plan was good, but we took it to a more functional level and maximized the space. The goal was to keep everything feeling open and bright with warm undertones.
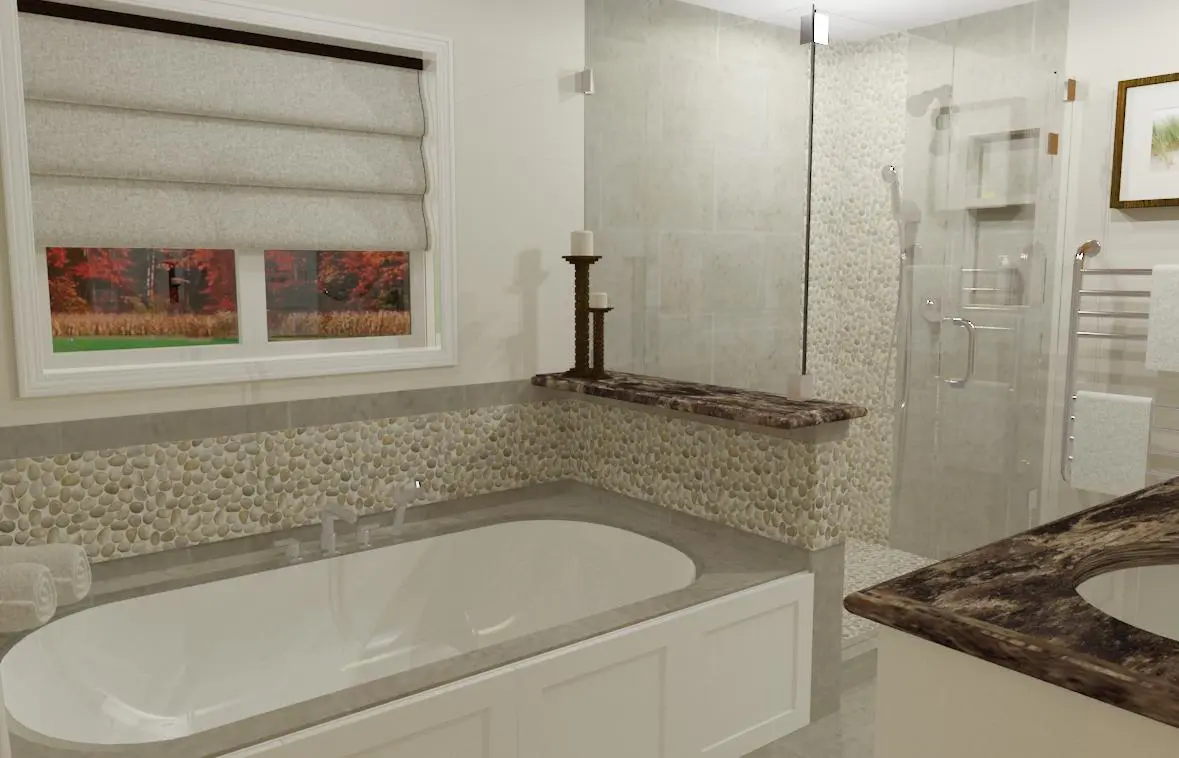 3-D rendering of the future bathtub and shower wall, complete with updated glass, faucets, and tile. / Design by: Carla Bast, Carla Bast Design
Out went the darker colors, and in came neutral shades of creamy whites and soft browns. Additionally, we opted for a surrounding glass wall and door for the shower to bring in the light. The bathroom floor tile was brought up the walls of the shower and accented with natural pebbles. We also brought the cabinetry up to the ceiling (above the toilet and between the vanity area sinks) to add visual height to the space. The result was a modern bathroom and spa-like environment that felt timeless, and popular in a bathroom renovation.
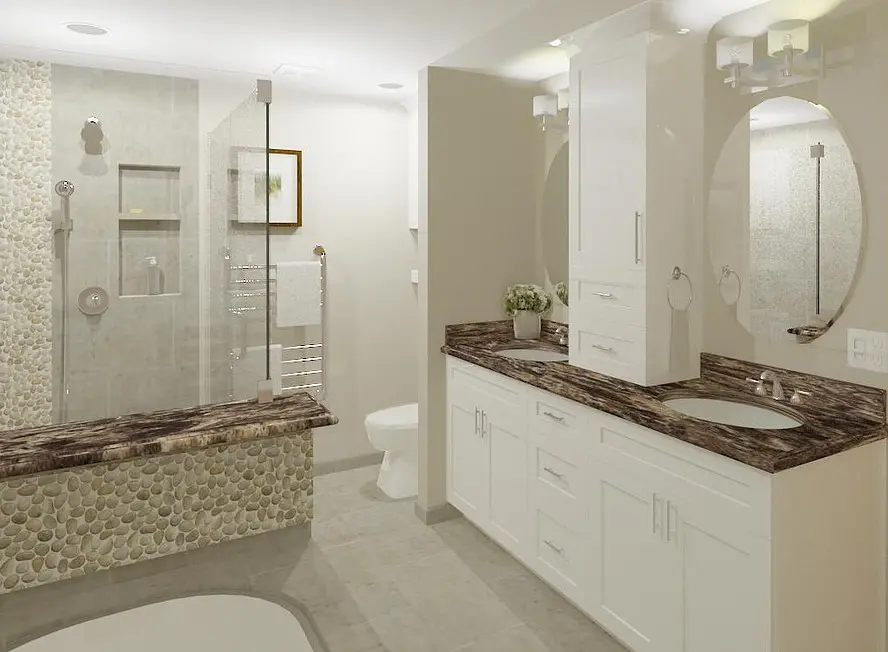
3-D rendering of the double vanity sinks and separate toilet area, including ample storage solutions on the vanity. / Design by: Carla Bast, Carla Bast Design
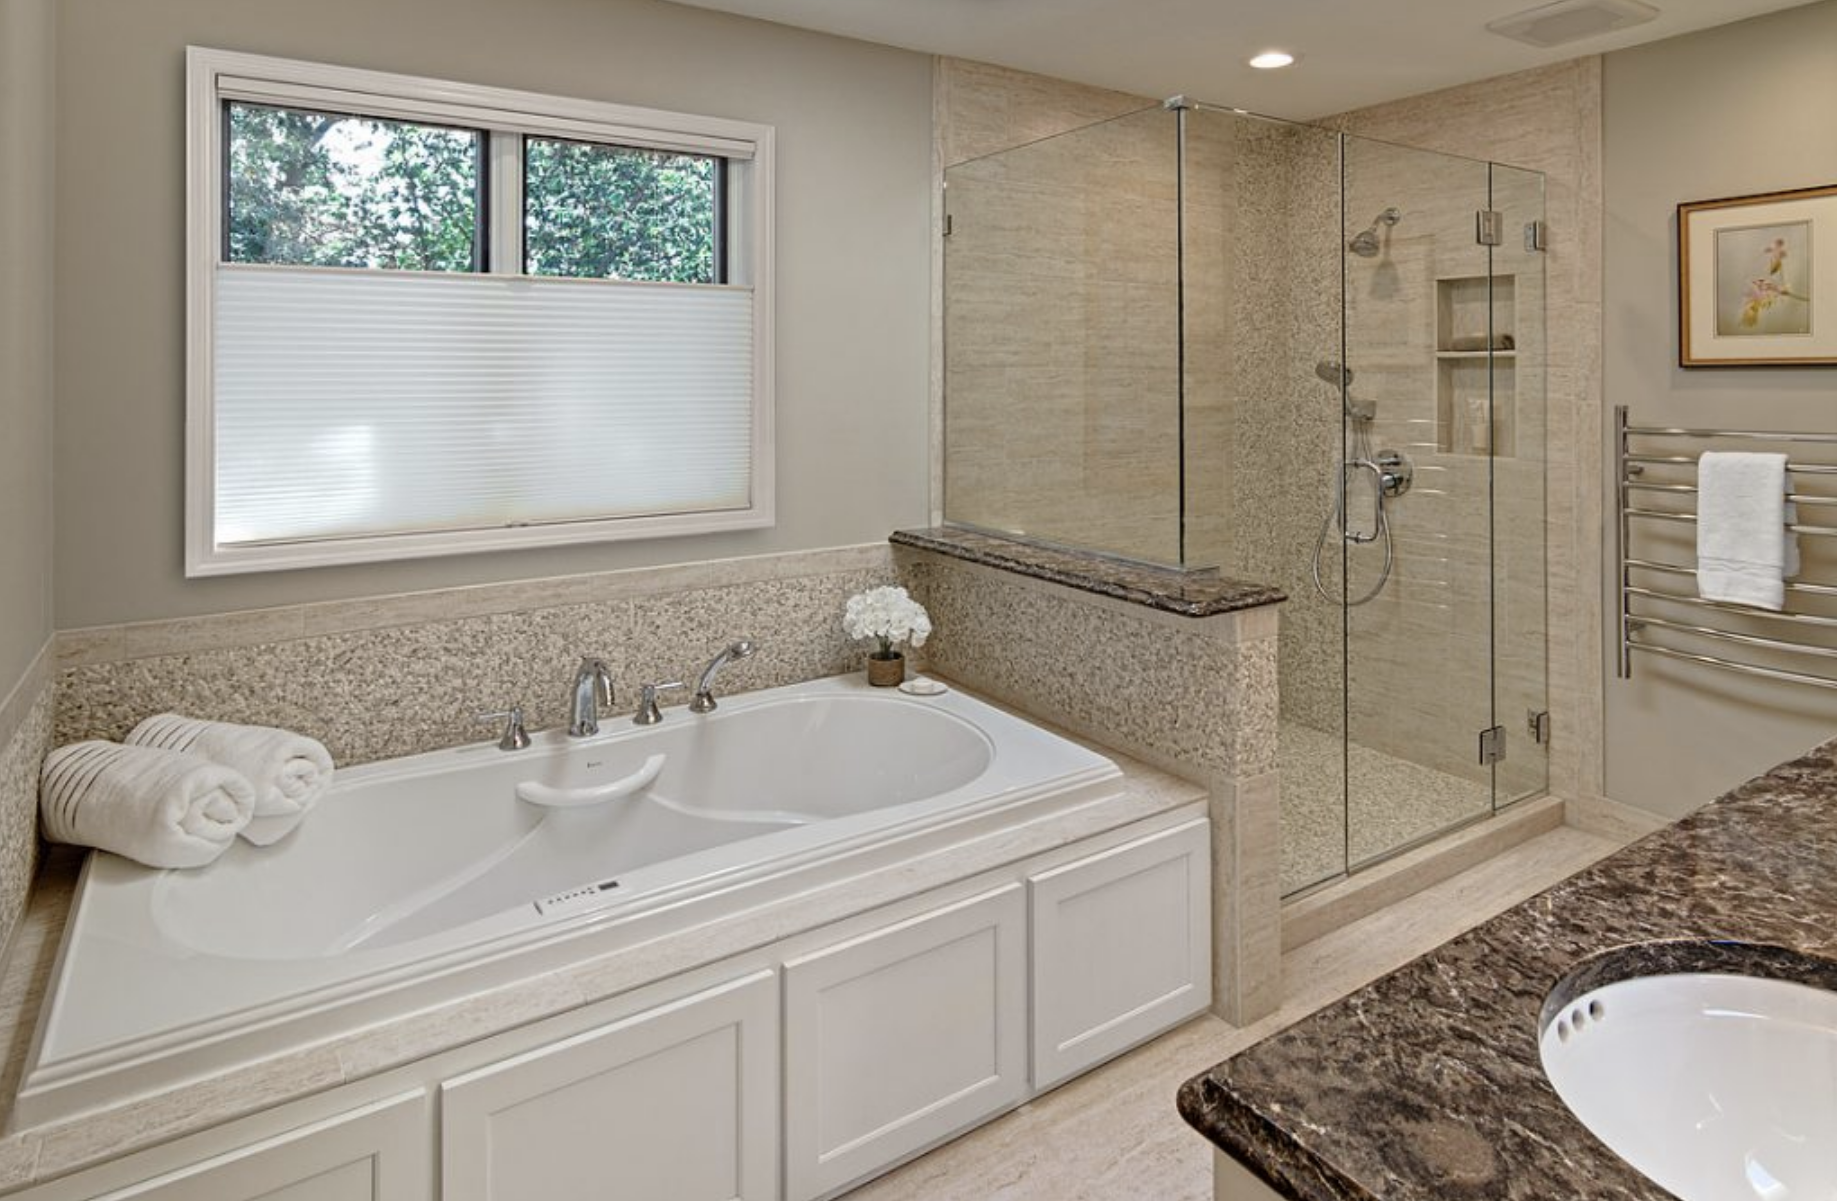 In the new bathroom design, the tub and shower felt much more open, allowing light to penetrate the entire bathroom and making everything feel much larger. The tub faucet was relocated and updated with a hand shower. Design by: Carla Bast, Carla Bast Design
RELATED: Best Paint Colors for Your 90s-Era Home
 In the final design, we incorporated shades of creamy white and brown, and kept all the finishes timeless and elegant in sparkling chrome. New lighting creates a more classic look over the double sinks. Design by: Carla Bast, Carla Bast Design
RELATED: Tile Ideas and Inspiration to Update your 90s – Era Home
This main floor master bathroom Classic 90s-era design choices were apparent in this original bathroom with oversized mirrors above the vanities to start. Of course, mirrors do tend to make spaces feel larger. Yet, because of the paint colors and dark cabinetry, the room surprisingly felt like it was shrunk into itself. The other trend that was stuck in the 90s? Unnecessary steps to the soaking bathtub and glass-surround shower. Instead of opening up the space visually, it gave off a bulky vibe that didn’t fit the confines of the bathroom.
 Though there was a large mirror in the bathroom, the dark paint colors and the honey oak cabinetry kept the space feeling small and cramped.
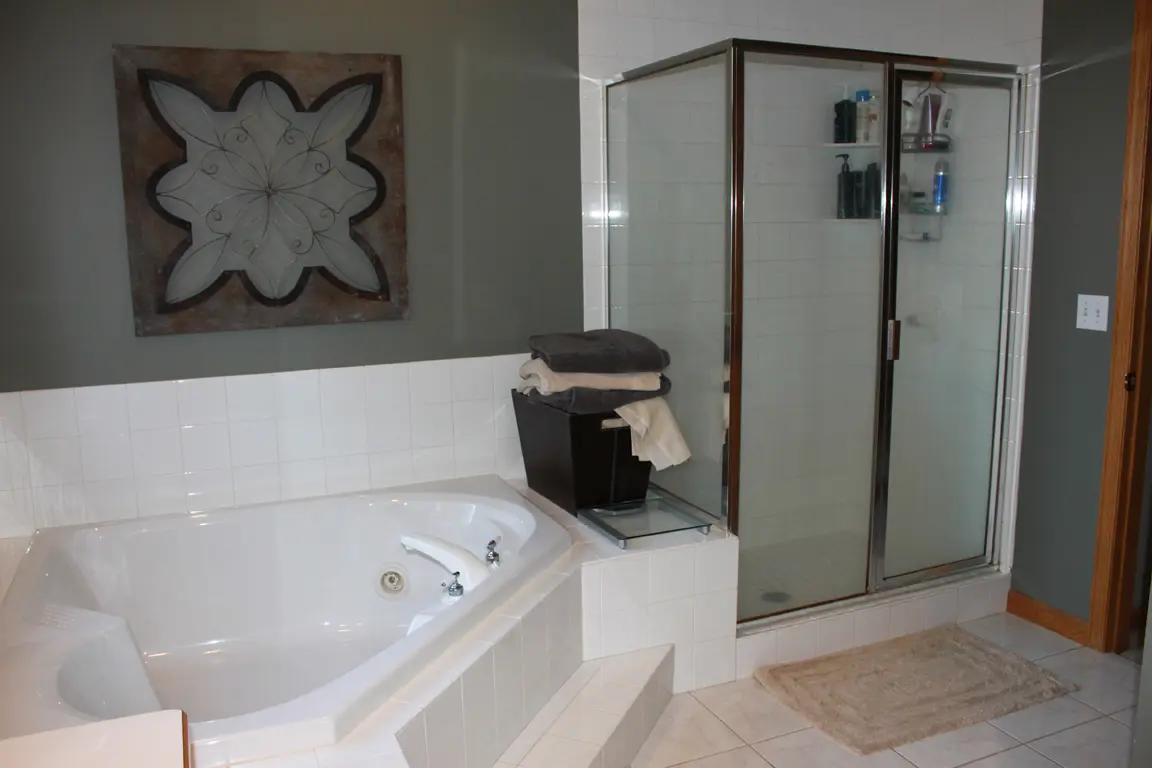 An outdated shower door, basic 4 x 4 shower tile and too-large corner tub kept this bathroom stuck in the 1990s.
To get the most out of the space, we kept everything largely in its original location including the private water closet. We opted to simply update the materials and slightly alter the sizing of shower and bathtub. Our client decided against a freestanding tub and opted for an updated deck-mounted tub opening up floor space. This allowed for a built-in nook for towel storage that was both functional and stylish. The shower was expanded as well to include a convenient bench seat inside.
The tile throughout the space were updated for a more streamlined marbled look to make everything feel cohesive with smooth transitions between each area. We changed the paint to a calming blue/green.
RELATED: 10 Modern Kitchen Design Ideas with Honey Oak Cabinets
And finally, we updated the cabinetry and countertops to lighter, elegant colors. Because of these changes, we were able to keep the original mirror intact. With all of these updates, it finally had the intended effect on the room to feel larger and much more spacious overall.
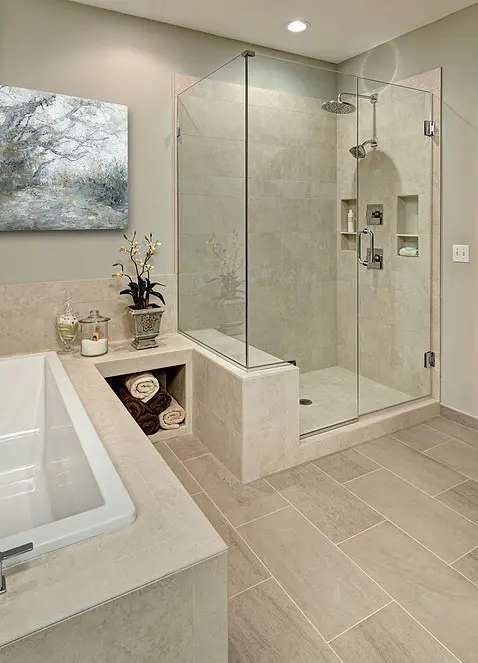 By swapping out the old tub for a water saving sleek and contemporary model, we opened up floor space. This made a world of difference in making this beautiful room feel much more open and airy. Sleek new wall tile in shades of cream finished off this beautiful space./ Design by: Carla Bast Design
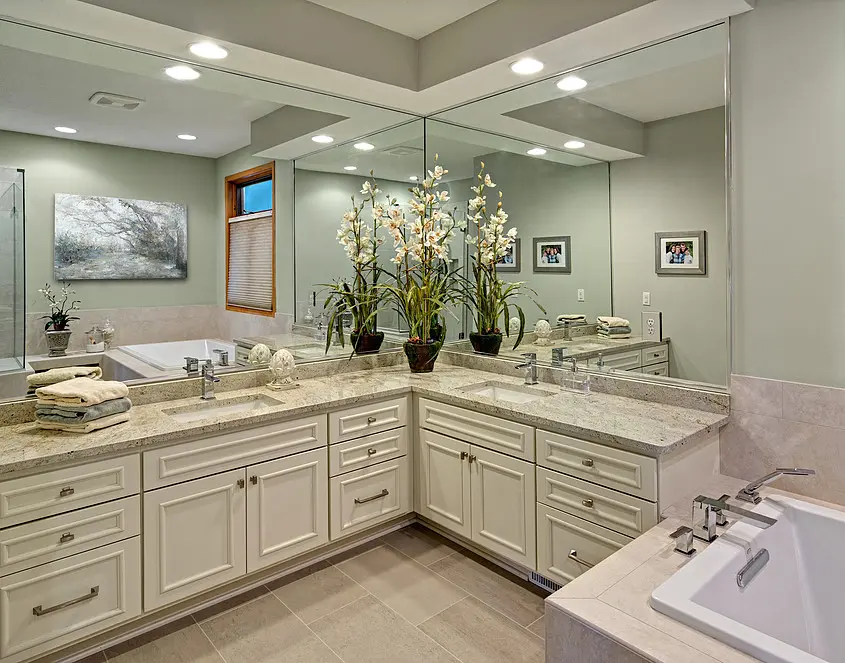 New paint and a fully-updated cream vanity with rectangular undermount bathroom sink gave this bathroom an instant style upgrade and instantly make the space feel larger in size. / Design by: Carla Bast Design
Looking around your own 90s-covered bathroom and wondering if those outdated tiles and too-blue colors will ever get a facelift? Take a cue from these two project transformations for your bathroom home improvement project. Breathe new life into your bathroom and create a modern oasis that will take you well into the next decade and beyond. For more 90s-era transformations for your own home check out my post on How to Work with Your Honey Oak Trim.

Hi, I’m Carla

I’m glad you’re here! You are in the right place if you are feeling overwhelmed at the thought of embarking on a remodeling or interior design project. Living with an outdated home and don’t know where to start? I’ve helped families like yours update their home and create spaces that reflect what’s important to them for over 25 years.
I’ve been honored to be featured in:
Real Homes
The Spruce
Apartment Therapy / Cubby
Twin Cities Luxury + Fashion
MSP Magazine
Minneapolis Star Tribune
Hunker
Home Crux

Modernizing Your Oak
or Wood Kitchen

Free Paint Guide

5 Tips for Stress Free Remodel
Don’t miss a thing!
Enter your email below to be the first to know about design posts, new products and tips for a more beautiful home.
Don’t miss a thing!
Enter your email below to be the first to know about design posts, new products and tips for a more beautiful home.
10 Responses
Beautiful transformations! Wow, what a difference just adding the surrounding glass door and wall on the shower in the first example made in the first example.. Love all the color and material selections.
These are both beautiful transformations, Carla. You have fortunate clients and I can only imagine how happy they are both with their new bathrooms.
I especially love how you magnified the sense of light in both bathrooms through your choice of materials and paint. Gorgeous work!
Those updates to the shower/tub areas really help. Love the modern showers here.
Hi Carla… these are both amazing transformations. I appreciate how you were able to add both the shower and bath separately without the space looking too cramped. Good job. I can’t wait to see what you come up with next.
KaSonndra Leigh
I think I’ve seen that bathroom many times over 🙂 Builders in a certain era seemed to be awash in that honey oak! Beautiful transformations – so much more open and bright and relaxing!
i agree wholeheartedly. Don’t start without a plan! I love to demo a 1990s bathroom! I see you do too! I love the fresh updates you made, and your rendering skills are such an asset. Are you using Chief Architect?
Thanks for the information, i really appericate it.
Going for a clear shower door really looks like a great idea. Since our current bathroom does indeed look a bit too dark sometimes, I feel like using more clear glass could help light the place up. I’ll take this idea once I find a shower door provider so we can make our bathroom feel less cramped.
Beautiful ideas, Carla! Thanks for sharing them. We are wanting to do a bathroom remodel in Logan, UT and needed some inspiration of where to start. This helps a ton!
Thank you so much for sharing these ideas, Carla! My husband and I just moved into a new house (early 90’s build but new to us) and I spend a lot of time in the bathroom, getting ready, bath times, and helping my kids before school, so I knew it was a must to redo the bathrooms. I’ve booked professional cabinet refinishing Syracuse, UT and now I’m looking for inspo decor wise. One thing I noticed in your post that is so brilliant is the shade on the window of the bathroom. I love how you can close it from the bottom so when I get in the bath, I can still have some natural light coming in. Thanks again for sharing!